

SSO is available on Enterprise plans.
Configure SSO
Okta
1
Configure Okta SSO in your Mintlify dashboard
- In your Mintlify dashboard, navigate to the Identity & access page.
- Click Configure.
- Select Okta SAML.
- Copy the Single sign on URL and Audience URI.
2
Create a SAML app in Okta
- In Okta, under Applications, create a new app integration using SAML 2.0.
-
Enter the following from Mintlify:
- Single sign on URL: the URL you copied from your Mintlify dashboard
- Audience URI: the URI you copied from your Mintlify dashboard
- Name ID Format:
EmailAddress
-
Add these attribute statements:
3
Copy the Okta metadata URL
In Okta, go to the Sign On tab of your application and copy the metadata URL.
4
Save in Mintlify
Back in the Mintlify dashboard, paste the metadata URL and click Save changes.
Microsoft Entra
1
Configure Microsoft Entra SSO in your Mintlify dashboard
- In your Mintlify dashboard, navigate to the Identity & access page.
- Click Configure.
- Select Microsoft Entra ID SAML.
- Copy the Single sign on URL and Audience URI.
2
Create an enterprise application in Microsoft Entra
- In Microsoft Entra, navigate to Enterprise applications.
- Click New application.
- Click Create your own application.
- Select “Integrate any other application you don’t find in the gallery (Non-gallery).”
3
Configure SAML in Microsoft Entra
- In Microsoft Entra, navigate to Single Sign-On.
- Click SAML.
- Under Basic SAML Configuration, enter the following:
- Identifier (Entity ID): the Audience URI from Mintlify
- Reply URL (Assertion Consumer Service URL): the Single sign on URL from Mintlify
4
Configure Attributes & Claims in Microsoft Entra
- In Microsoft Entra, navigate to Attributes & Claims.
- Select Unique User Identifier (Name ID) under “Required Claim.”
- Change the Source attribute to
user.primaryauthoritativeemail. - Under Additional claims, create the following:
5
Copy the Microsoft Entra metadata URL
Under SAML Certificates, copy the App Federation Metadata URL.
6
Save in Mintlify
Back in the Mintlify dashboard, paste the metadata URL and click Save changes.
7
Assign users
In Microsoft Entra, navigate to Users and groups. Assign the users who should have access to your Mintlify dashboard.
JIT provisioning
When you enable JIT (just-in-time) provisioning, users who sign in through your identity provider are automatically added to your Mintlify organization.JIT provisioning only works for IdP-initiated login. Users must sign in from your identity provider (Okta dashboard or Microsoft Entra portal) rather than starting from the Mintlify login page.
Verified domains
Verify ownership of your email domains so Mintlify can scope SSO and member provisioning to people with matching email addresses. When someone signs in with an email address on a verified domain, Mintlify automatically routes them to your identity provider. Automatic routing works whether or not you require SSO, as long as your organization has an active SSO connection. You can add up to five verified domains per organization.- Navigate to the Identity & access page in your dashboard.
- On the SSO tab, in the Verified domains section, enter the domain (for example,
example.com) and click Add. - Mintlify generates a verification token. In your DNS provider, create a TXT record with the name
_mintlify-verification.example.comand the token as the value. Some DNS providers append the domain automatically. If yours does, enter just_mintlify-verificationas the record name. - Return to the dashboard and click Verify. The status changes from Pending to Verified once the record propagates.
Require SSO
Organization admins can require everyone in the organization to sign in through your identity provider. When Require SSO is on, Mintlify rejects password, magic link, and Google OAuth sign-ins.- Navigate to the Identity & access page in your dashboard.
- Confirm that SSO works end-to-end. In a private browser window, sign in to your Mintlify dashboard from your identity provider’s app catalog (IdP-initiated) and from the Mintlify login page using an email on a verified domain (SP-initiated). Both flows should redirect through your identity provider and land you in the dashboard.
- On the SSO tab, in the Sign-in policy section, toggle Require SSO on.
Break-glass access
Designate members who can bypass SSO and sign in with a password or magic link. Use break-glass access to recover access if your identity provider has an outage or a misconfiguration locks members out.- Navigate to the Identity & access page in your dashboard.
- On the SSO tab, in the Break-glass access section, enter the email address of a member who should retain non-SSO access and click Add.
Map RBAC roles with SAML groups
Assign roles to users based on their identity provider group membership. When a user signs in through SSO, Mintlify reads thegroups attribute from the SAML assertion and maps those groups to dashboard roles.
Configure group attribute statements
Add agroups attribute statement to your SAML identity provider configuration. The attribute must use the unspecified name format.
The resulting SAML assertion should include an AttributeStatement.
Example SAML assertion
- The attribute name must be
groups(case-sensitive) - The name format must be
urn:oasis:names:tc:SAML:2.0:attrname-format:unspecified - Each group the user belongs to should be a separate
AttributeValueelement
- Okta
- Microsoft Entra
In your Okta SAML app configuration, add a group attribute statement:
Adjust the filter to match the specific groups you want to send to Mintlify.
Change or remove SSO provider
- Navigate to the Identity & access page in your dashboard.
- Click Configure.
- Select your preferred SSO provider or no SSO.
Other providers
For providers other than Microsoft Entra or Okta SAML, contact us to configure SSO.Google Workspace with SAML
1
Create an application
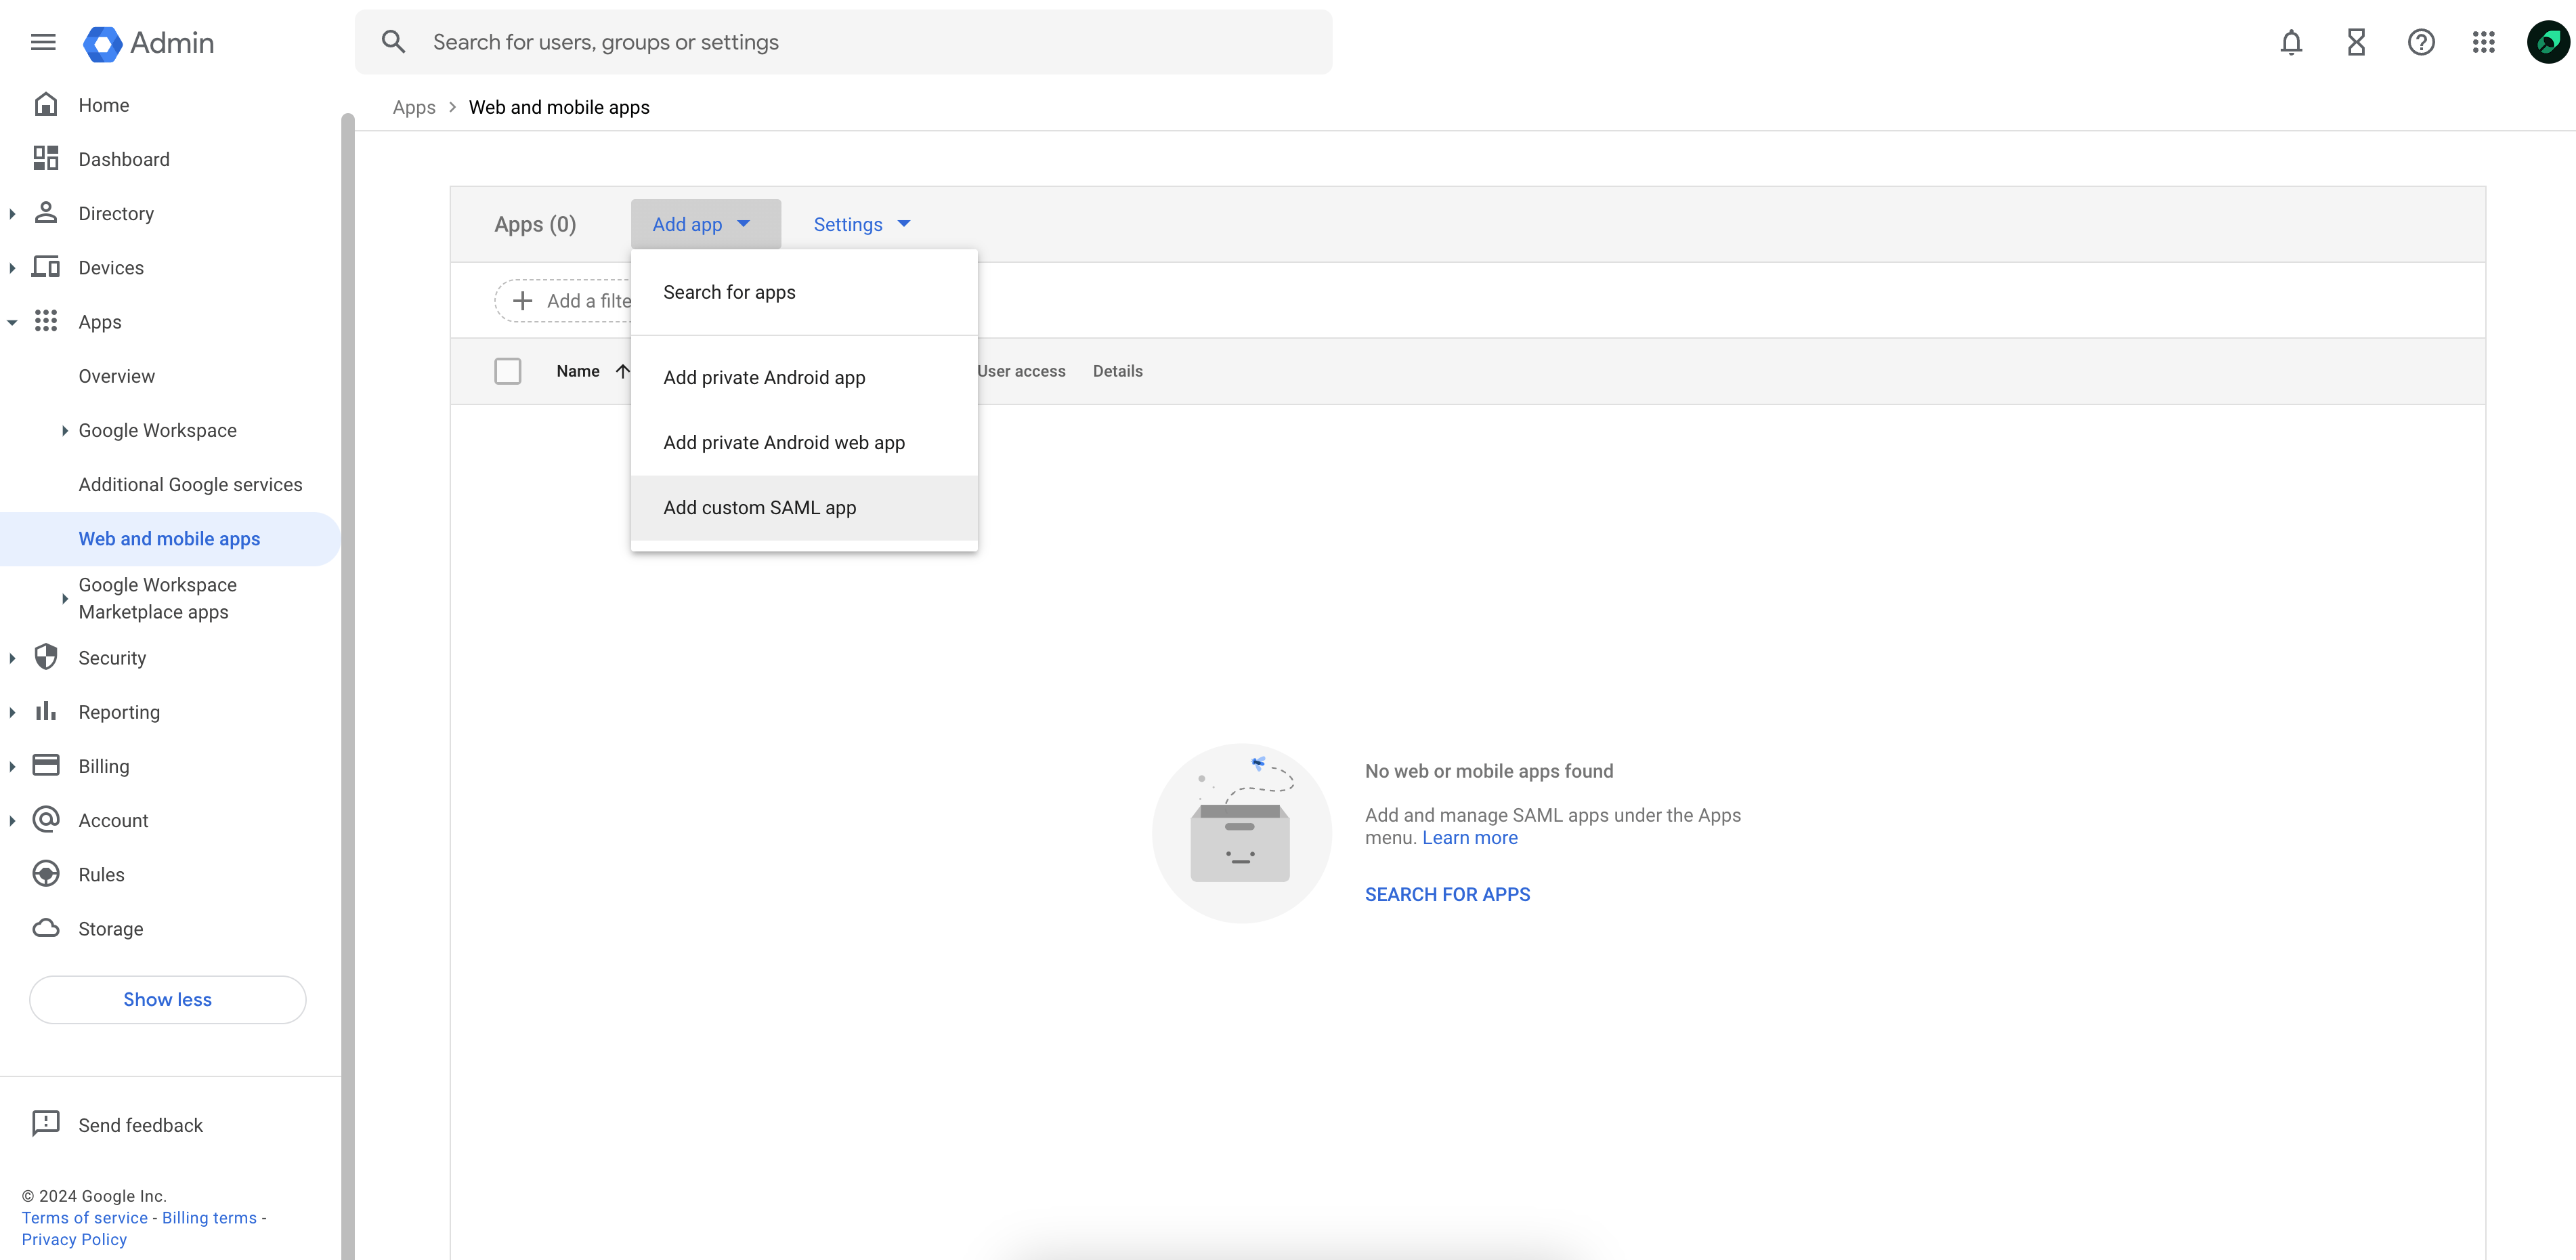
- In Google Workspace, navigate to Web and mobile apps.
- Click Add custom SAML app in the Add app dropdown.
2
Send us your IdP information
Copy the provided SSO URL, Entity ID, and x509 certificate and send it to the Mintlify team.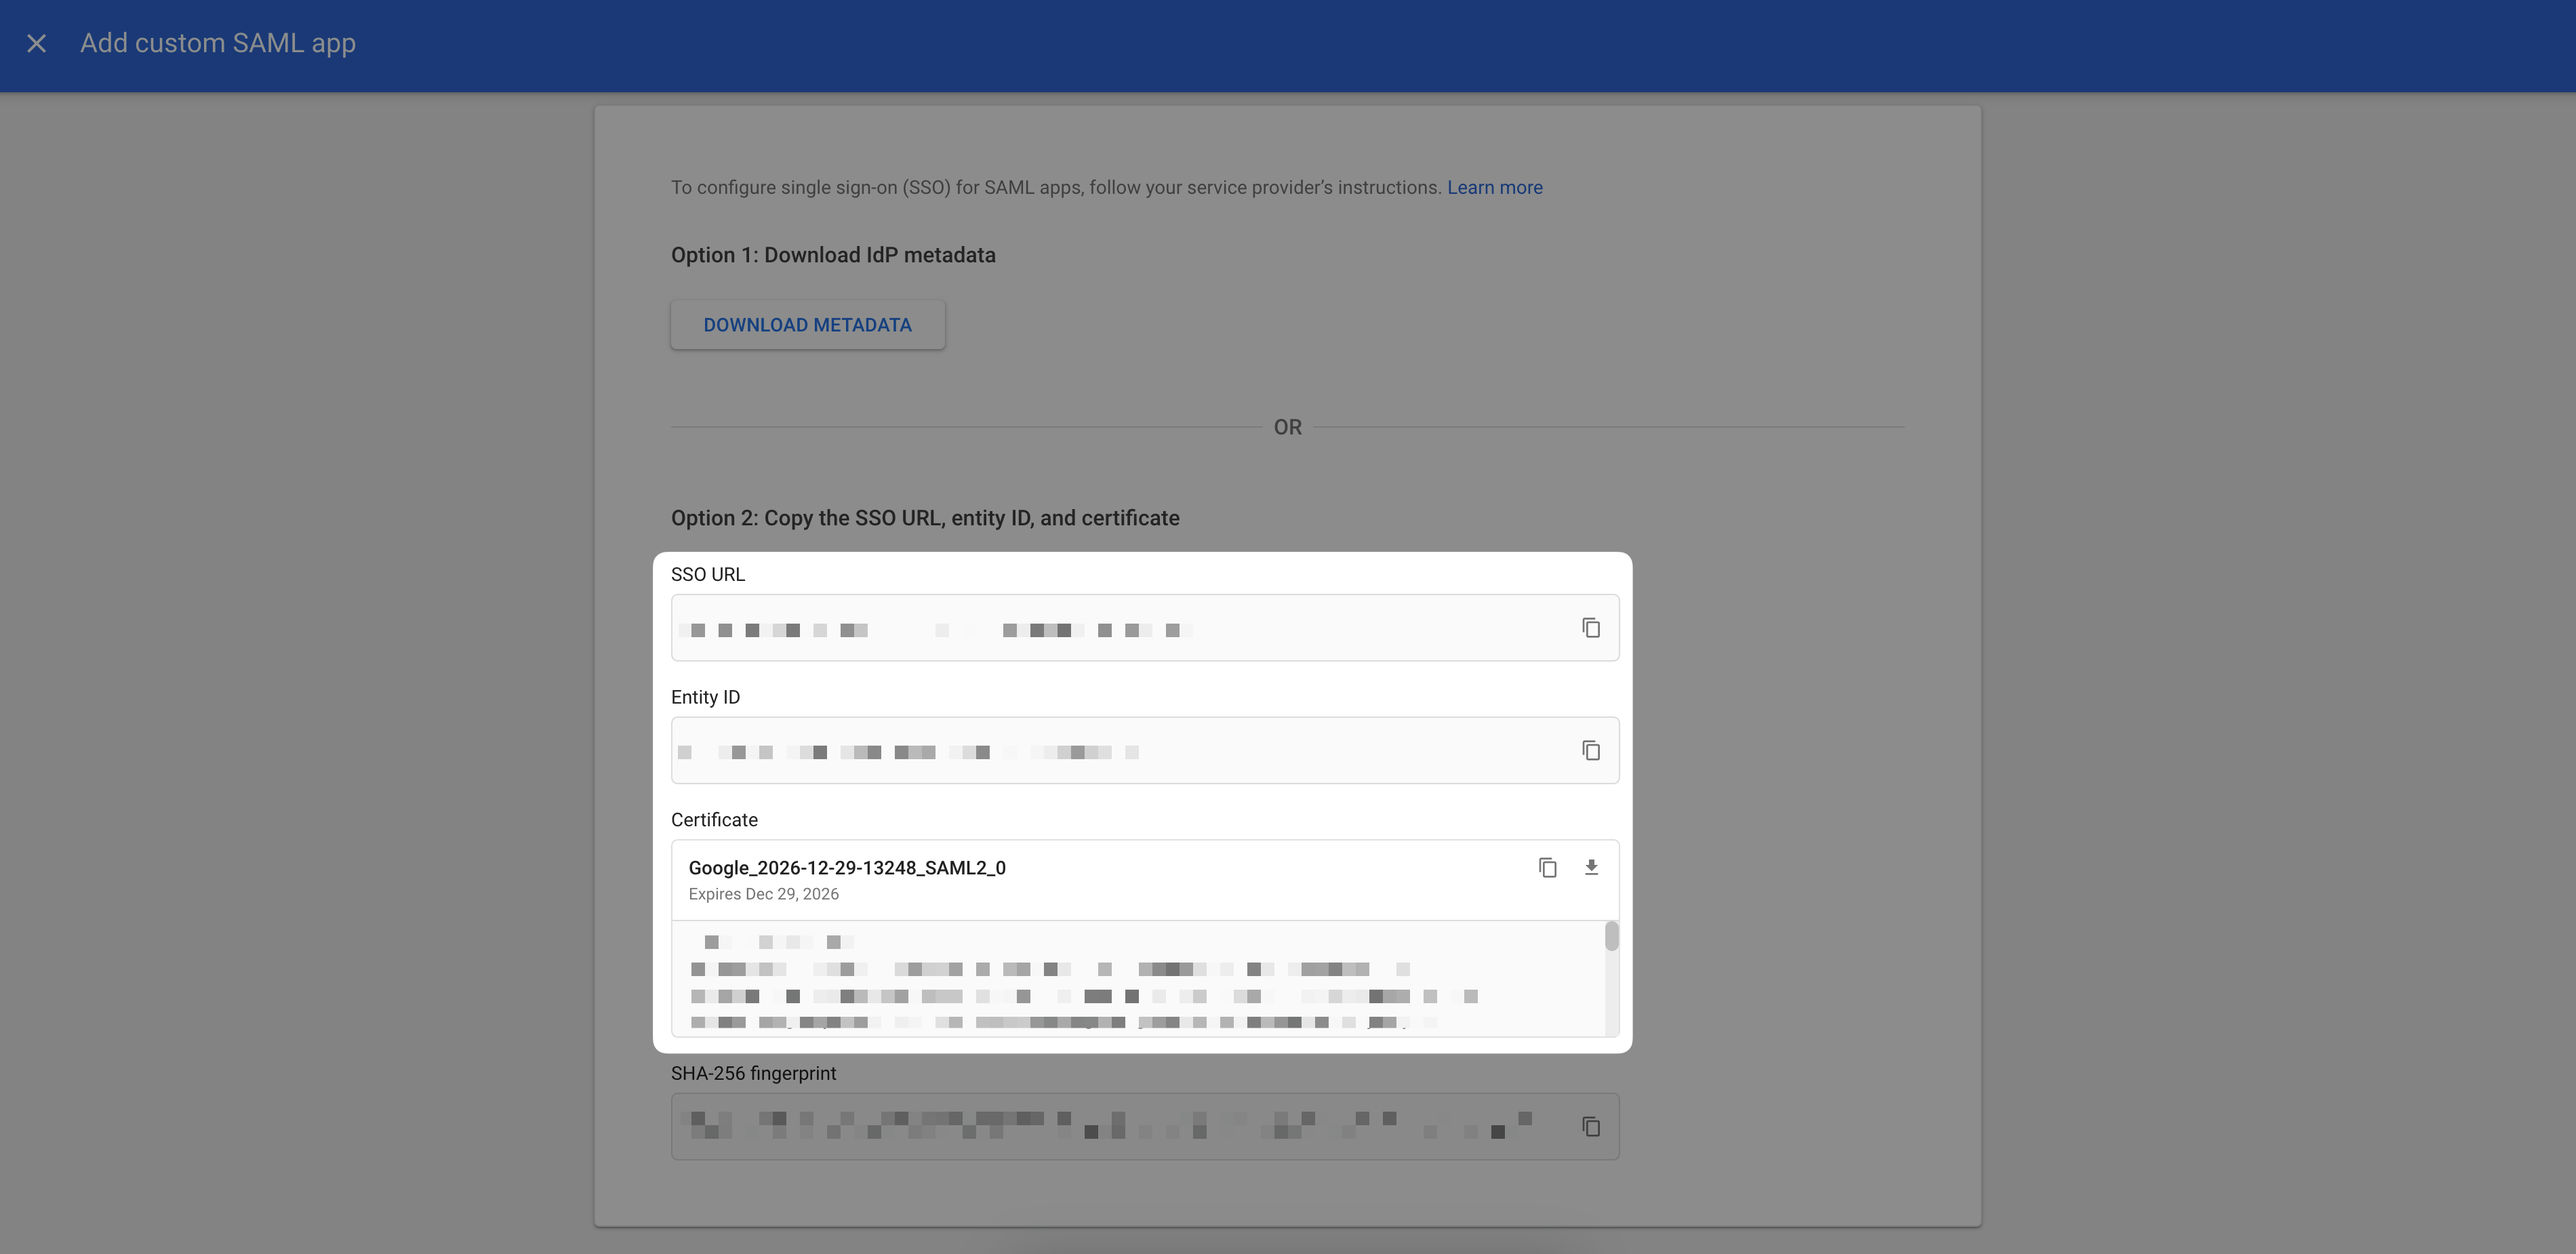
3
Configure integration
On the Service provider details page, enter the following: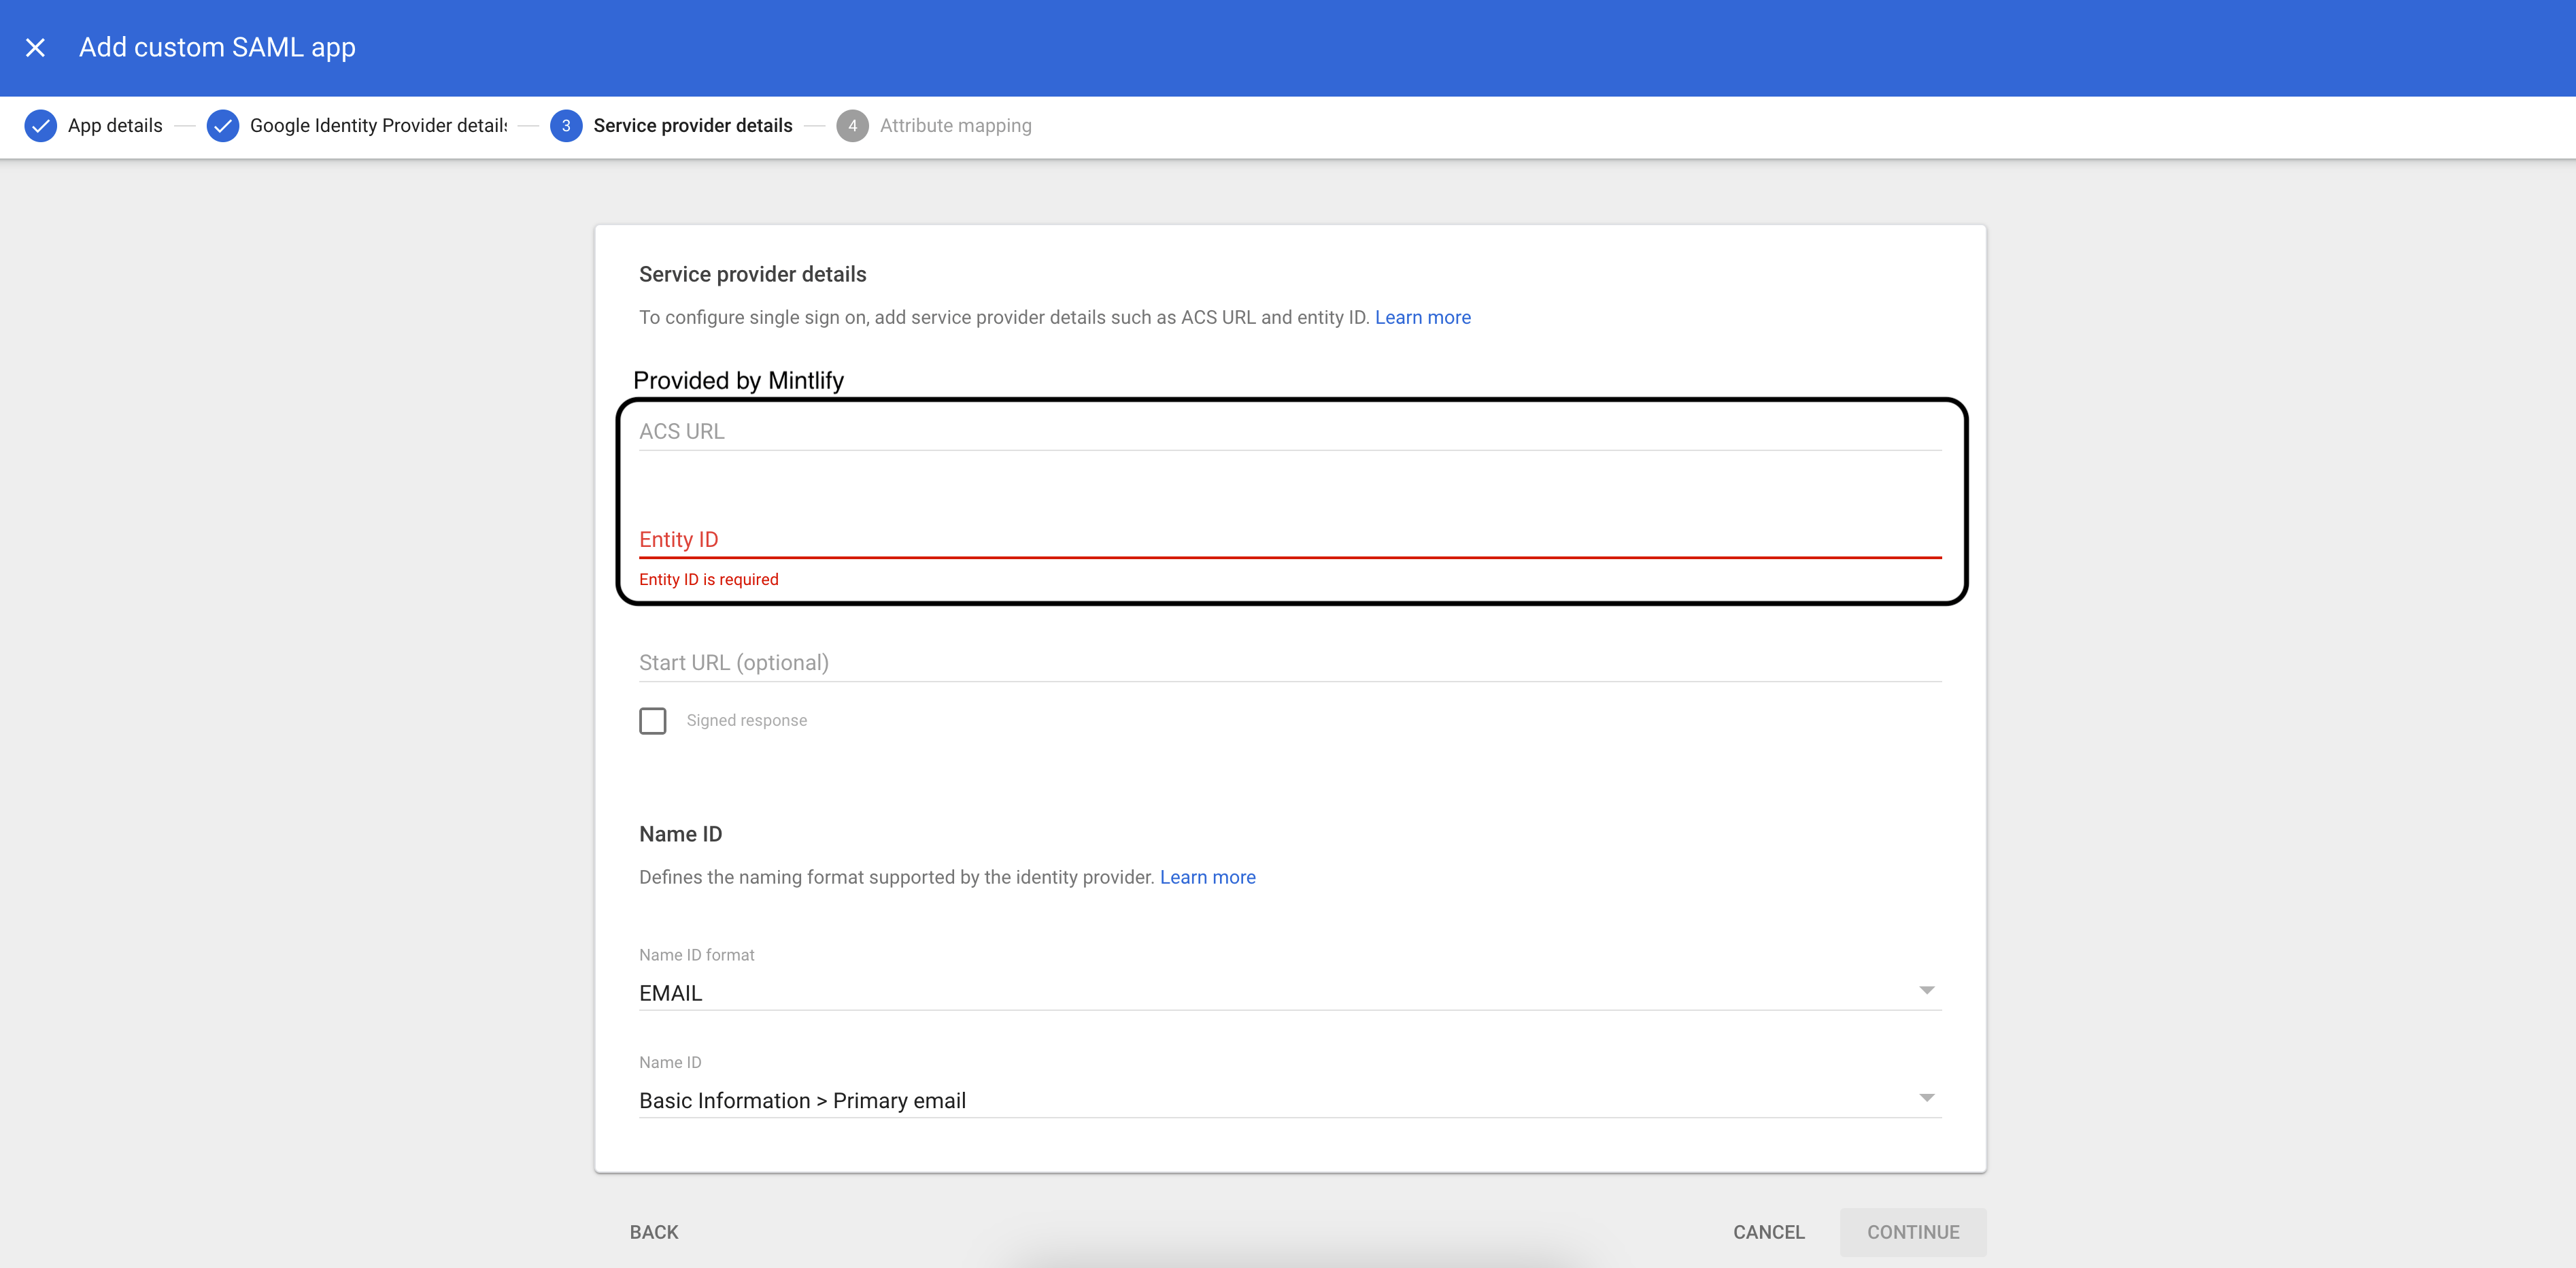
- ACS URL (provided by Mintlify)
- Entity ID (provided by Mintlify)
- Name ID format:
EMAIL - Name ID:
Basic Information > Primary email
Once this step is complete and users are assigned to the application, let our team know and we’ll enable SSO for your account.
Okta (OIDC)
1
Create an application
In Okta, under Applications, create a new app integration using OIDC. Select the Web Application type.
2
Configure integration
Select the authorization code grant type and enter the Redirect URI provided by Mintlify.
3
Send us your IdP information
Navigate to the General tab and locate the client ID and client secret. Securely provide these to us along with your Okta instance URL (for example,
<your-tenant-name>.okta.com). You can send these via a service like 1Password or SendSafely.